
Typewriter Text using Transfer Paper
I love typewritten text. There is something really satisfying about stamping the words out on the paper and I love the aesthetic of it, somehow timeless and nostalgic at the same time. I’m lucky to have a cute little 1950s typewriter that was my Nan’s, which I’ve had it for at least 15 years, and have typed my way through many reels of ribbon on it.
When I used to do paper scrapbooking I would use it all of the time to add detailed descriptions to the pages. Now when I am creating fabric books I also love to use the typewriter and I’ve experimented with a couple of ways to do it.
The way I’ll be showing you today is to use Photo Transfer Paper (the same stuff used to add photos to fabric). Using this method you will treat the typed text as a photo and print and transfer it to a plain fabric. You can read about the photo paper and method in more detail in this post about the paper, so here I’ll be assuming you have some experience using the paper.
If you haven’t got a typewriter you can use this method to transfer computer written text (perhaps use a typewriter style font) or hand written text instead.

How to create your text:
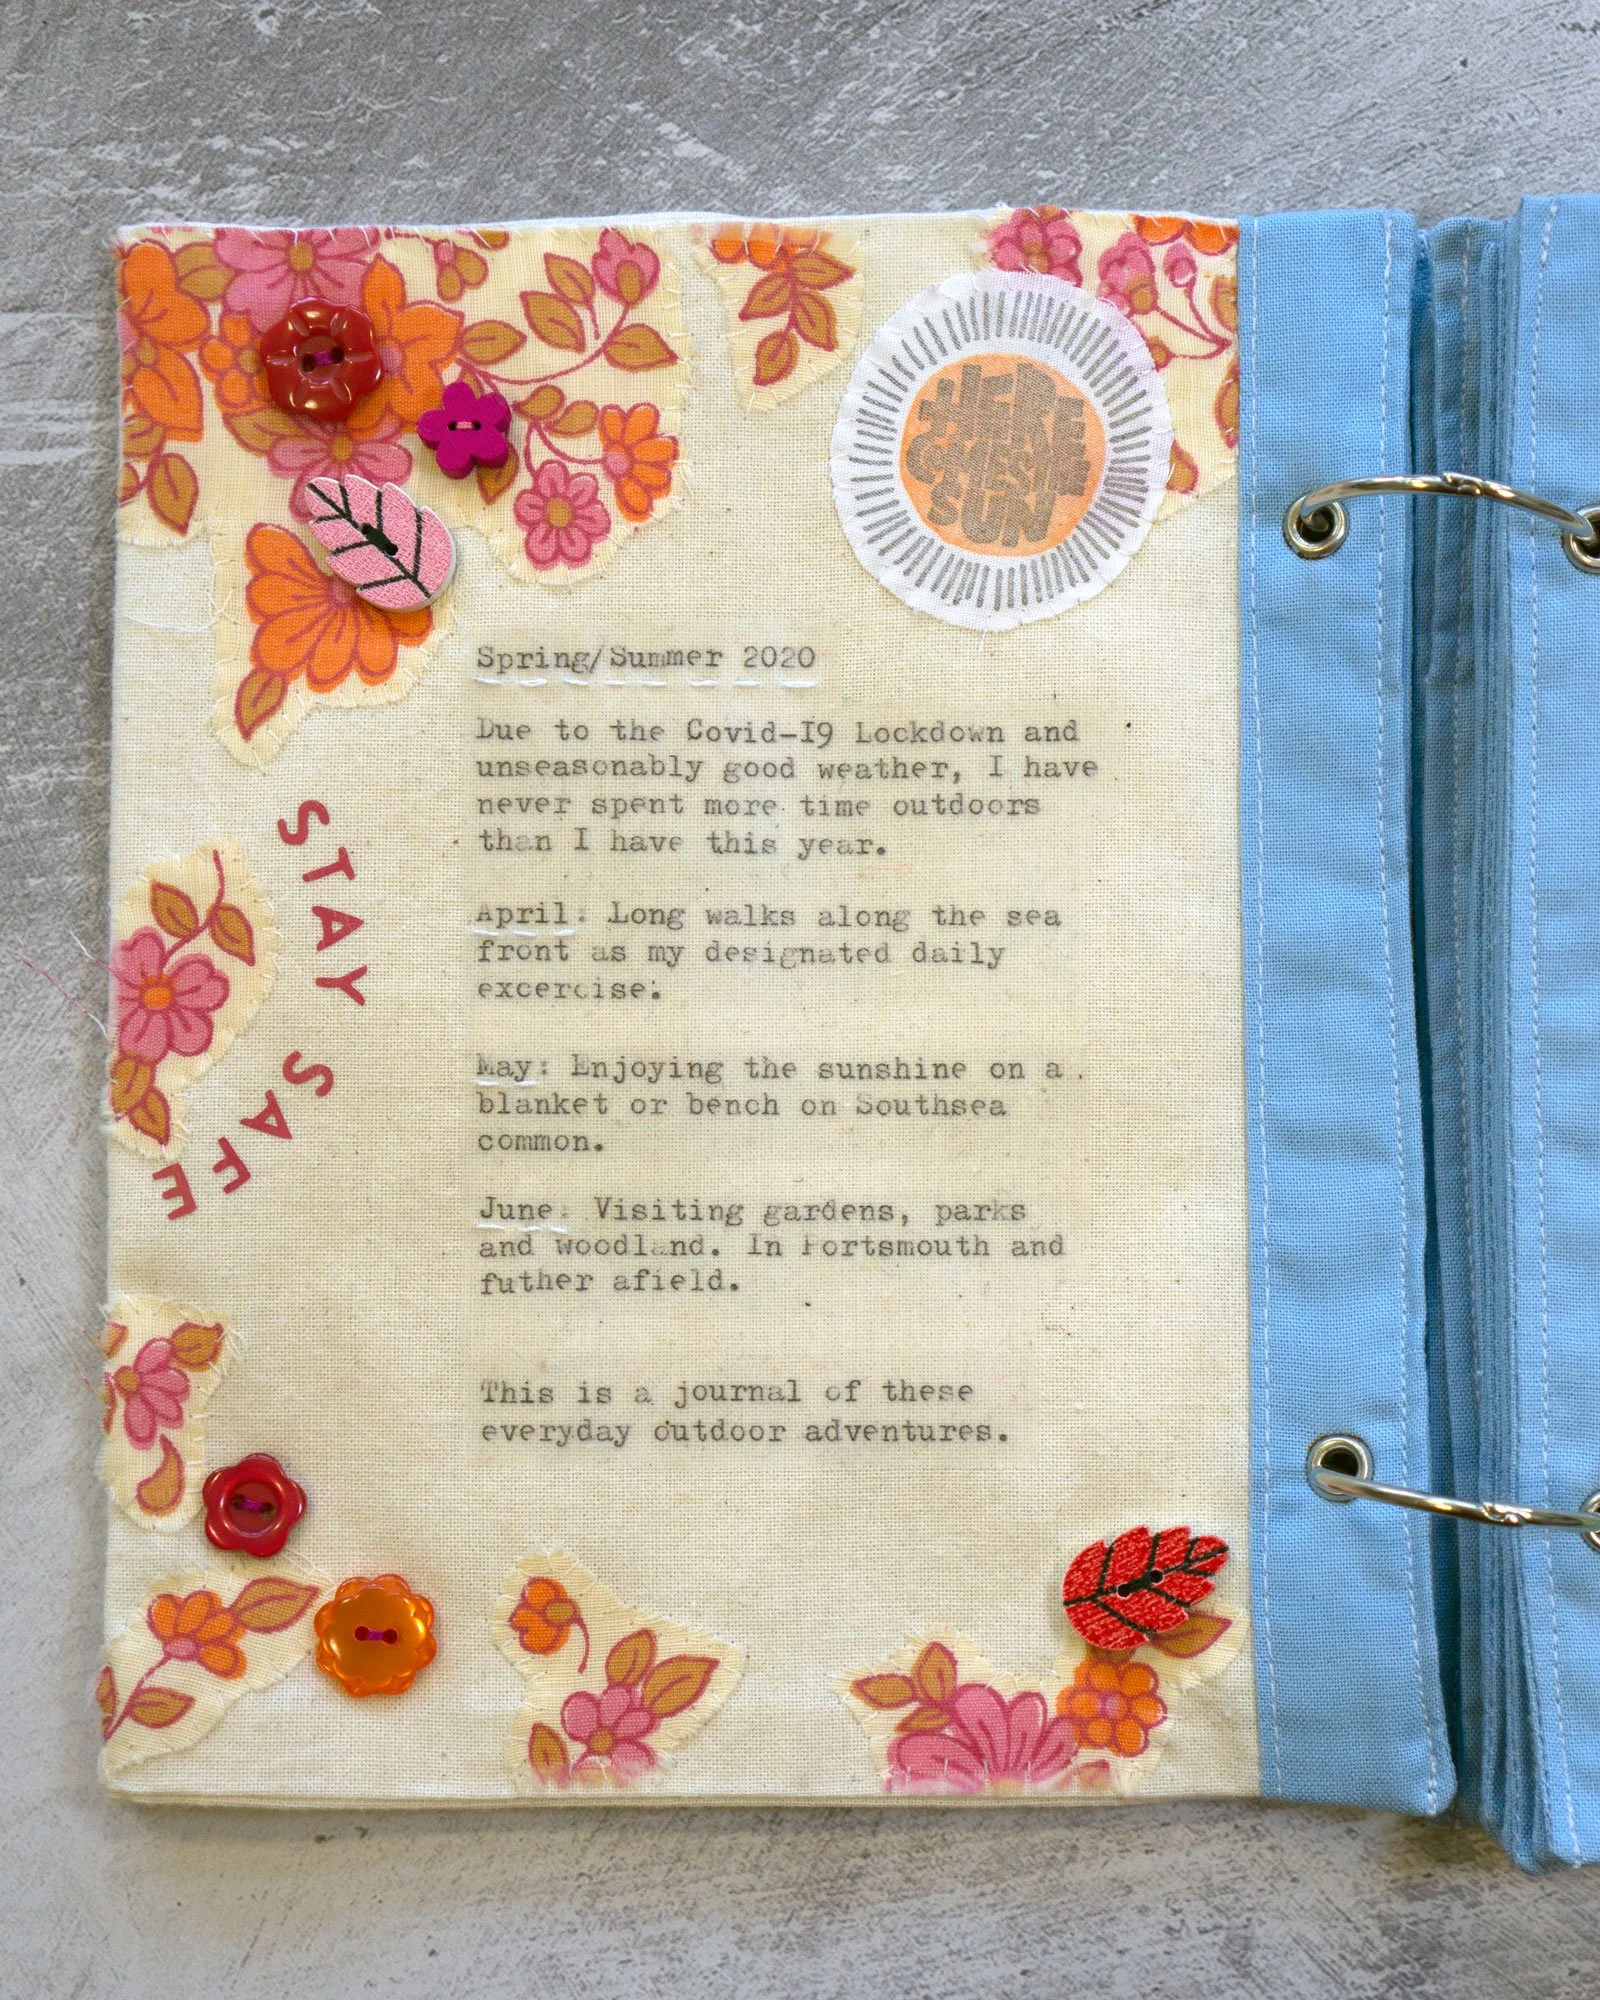
1. First use your typewriter to type your chosen text onto a sheet of white paper. Here I am creating an introduction to my Summer of Sunshine Stitchbook.

2. Scan the paper into a computer and paste into a blank document.
3. Measure your book and decide on a size for your text. I would recommend transferring to a blank white piece of fabric that you will later sew on, but if you are feeling brave you can do it directly onto the book. Here I want to fit it into the space left in between the flower appliques, so I needed to measure the space available.

4. Size your text to fit the space. If you want to test the size print out on normal paper first.
5. REVERSE the image. This is really important or your text will be backwards! You can use the ‘flip horizontal’ or ‘mirror’ function, depending on what program you are using.
6. Fill up the rest of the sheet with images - There’s no need to waste the rest of the paper!
7. Print your document onto the blank side of the Photo Transfer Paper
8. Cut out your text.
9. Place the text face down on your fabric - try and place along the grain so it won’t fray if you cut it out. Here I have positioned it carefully between the flowers.
10. Iron your over the paper to transfer following the manufacturers instructions.
11. Leave to cool (very important!) then peel the backing paper off. The text should have transferred onto the fabric. If you have transferred to a separate piece of fabric this can now be stitched into your book.
Important Note! Please remember that you cannot iron over photo transfers as they will melt! So adding the transfer should be one of the last things you do.
The finished page:
Be creative with this technique
There is great scope here for creating exciting things to add to your Stitchbooks. Using this method you are no longer restricted to only adding short bursts of text that need meticulous and time consuming stitching and stamping. You can add detailed descriptions of family history or holiday itineraries, lists of important thins, or poems and quotations. You can also use this method to add logos, handwritten text or drawings.
Want to dust off your typewriter and have a go? - find the Photo Transfer Kit in my shop here:
